1. What is a proxy manager?
Proxy Manager is lunaproxy's new integrated proxy management function. Through simple visual pages, flexible custom operations, rich interface examples, and various forms, it helps you create personalized configuration files and one-stop management of proxy needs to meet your needs. Your proxy business uses
Some of the most important features:
1. Instant preview of the entire traffic log facilitates troubleshooting and debugging
2. Cost optimization rules for automatically retrying failed requests
3. No need to write independent code and can be easily integrated with code programs, browsers, etc.
4. Access management by setting IP and device whitelist
5. IP rotation and sticky session management
Applicable solutions: Residential proxy
2. How to use the proxy manager?
1.Download and install lunaproxy proxy manager
Please log in to the luna dashboard with the account you registered.
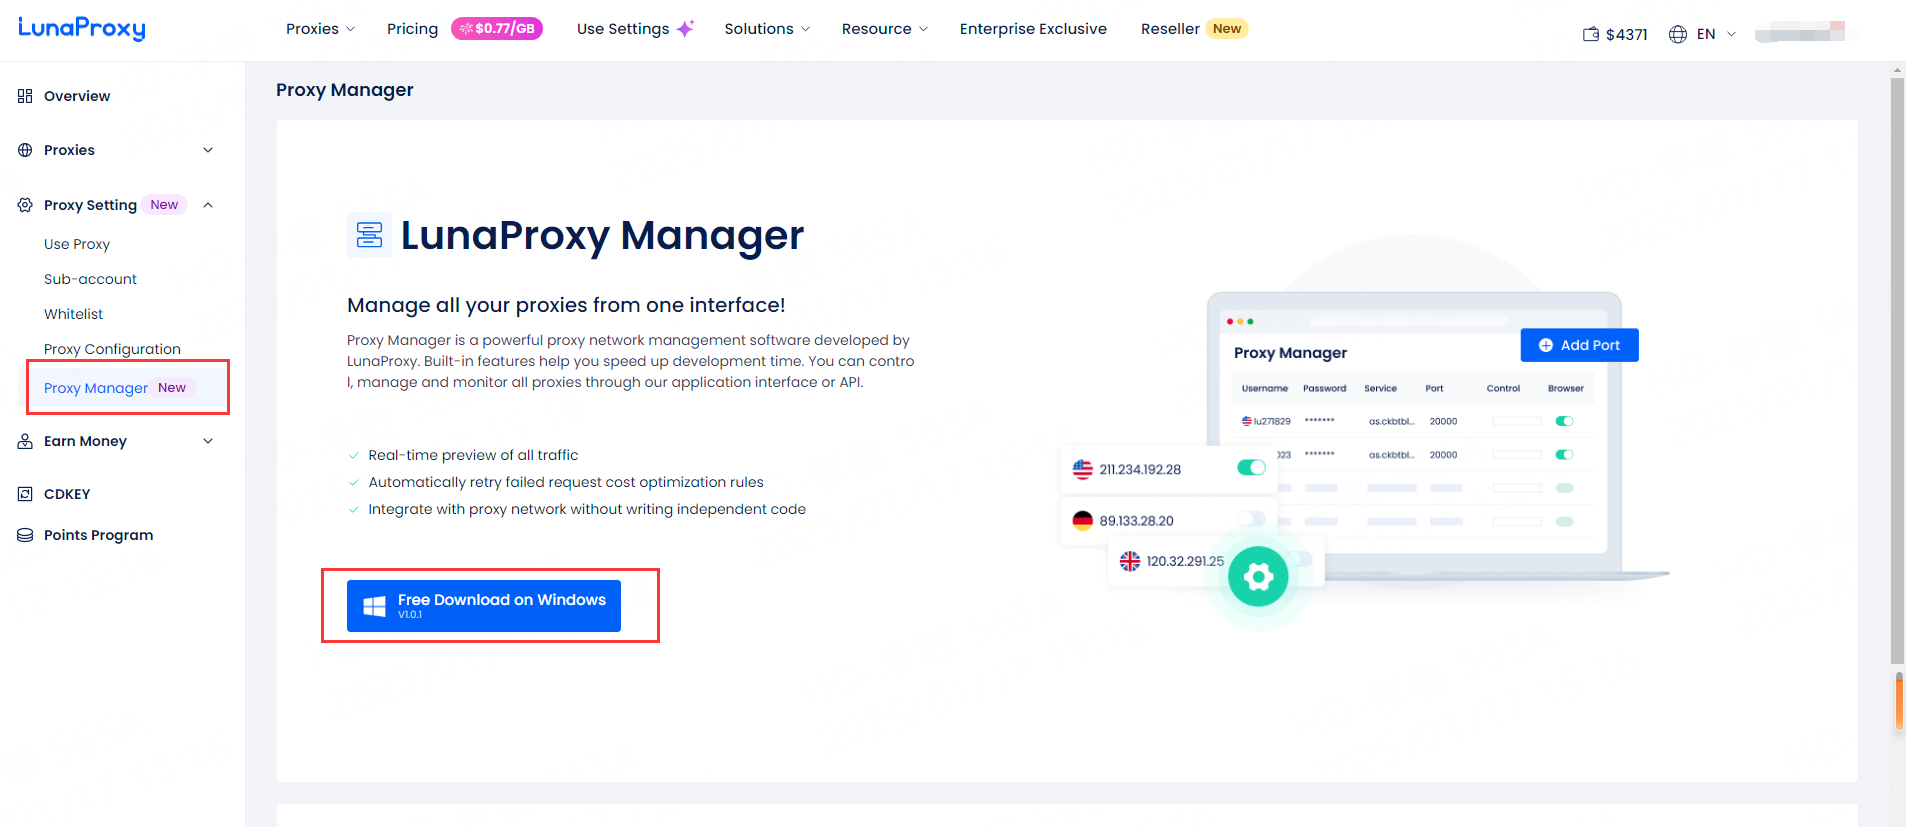
Click "Proxy Settings" on the left column -> Click lunaproxy proxy manager ->Click the Windows system installation button to download and install the luna proxy manager.
After installation, the luna agent manager icon will be displayed on the desktop, as shown in the figure:

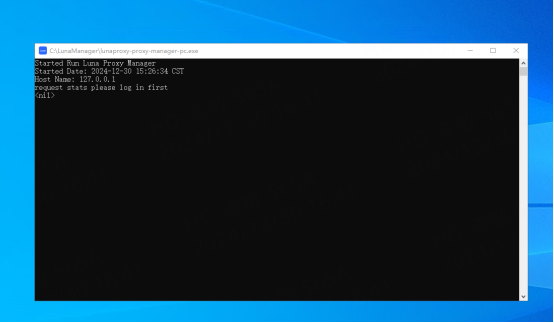
Click this icon to open the Agent Manager. Please note that the following code window that pops up after opening must not be closed and must be kept open to run. If you find it annoying, you can minimize it.
2. Create a port in luna proxy manager:
①Click "Add Port"

②
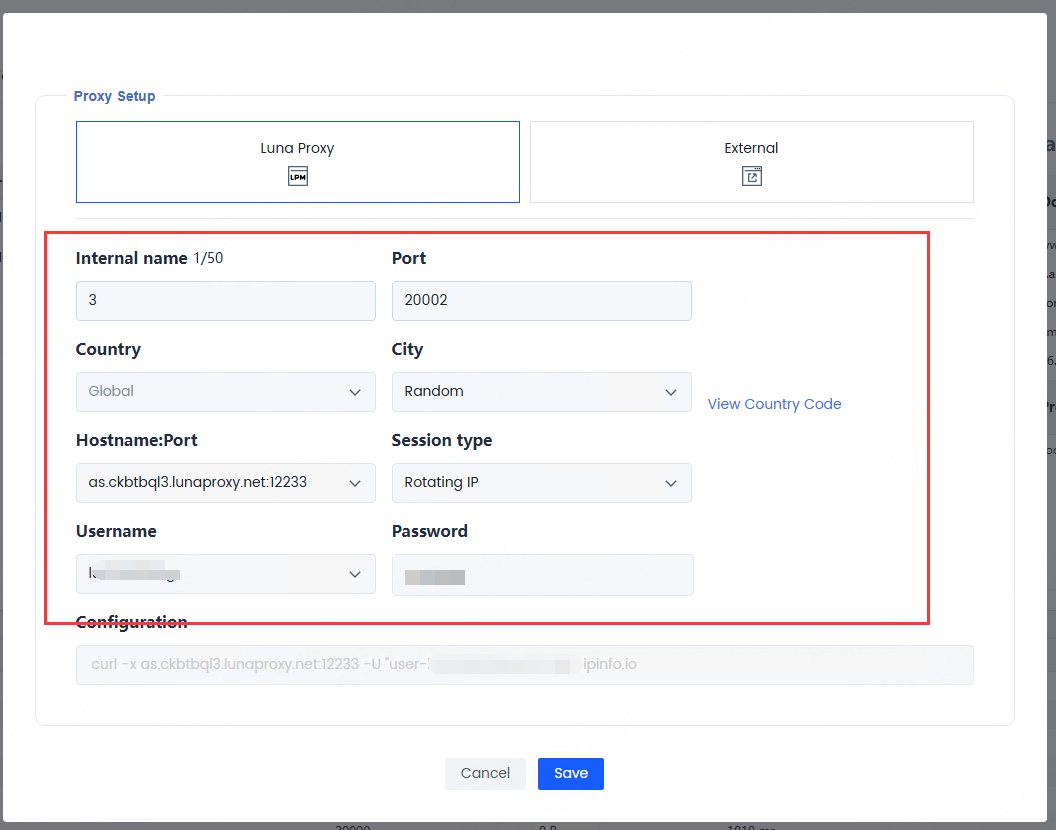
② Select LunaProxy, set proxy conditions as needed, such as country, city, host name: port, session mode, etc., and click Save.
Note: Note: Selecting LunaProxy means you want to use the residential proxy provided by LunaProxy.
③Click the "Copy" button to generate a new proxy with a different port and the same other information.

④Click here to release the port. After release, you will not be able to use the port. If you want to continue using it, you need to click again to open the port.
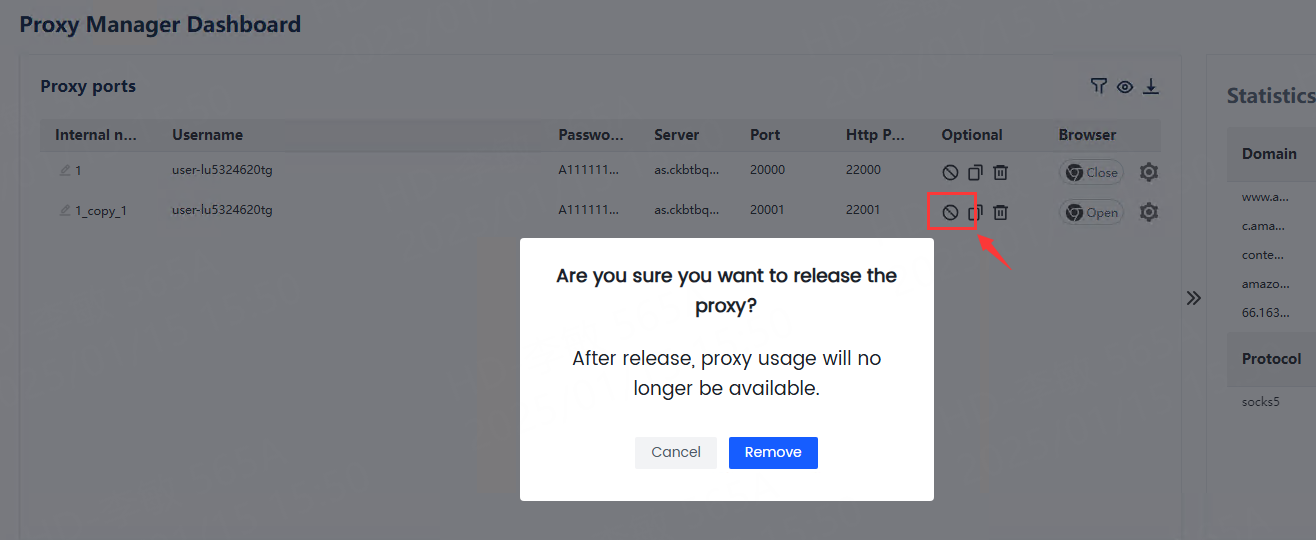
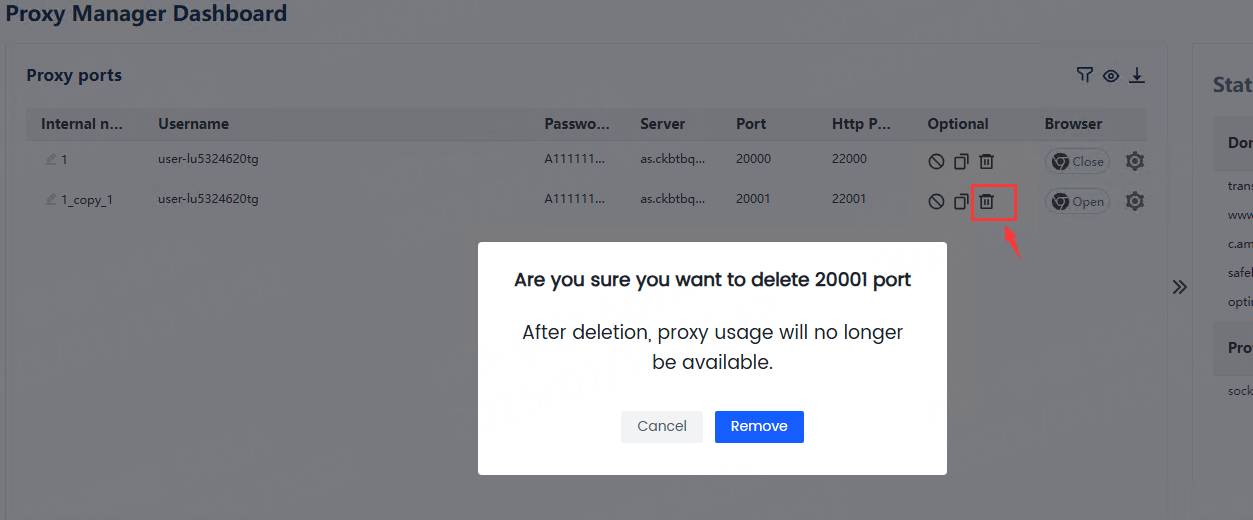
⑤Click here to delete a port。
Other Proxy
If you want to use a proxy provided by another proxy provider, you can paste the generated proxy command here and click Save to use it.
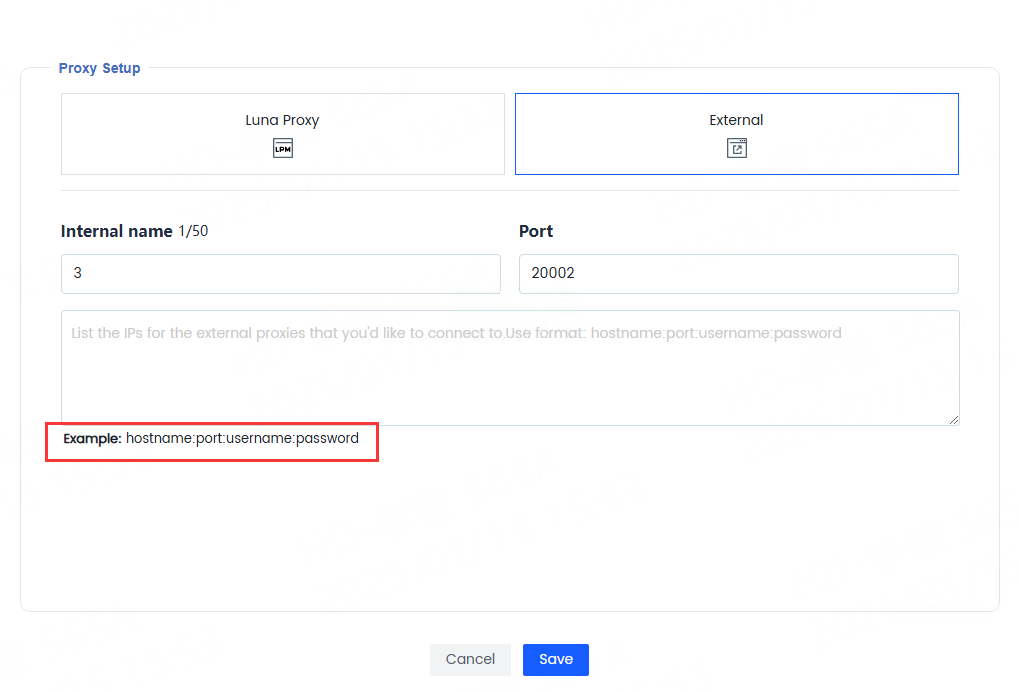
Note that you need to paste a specific format here:hostname:port,username:password。
Take lunaProxy as an example:
pr.*****.lunaproxy.net:1****3:user-lu5***tg-sessid-alljoig88dqa81fdt36-sesstime-90:****
3. Test whether the IP shows the target country:
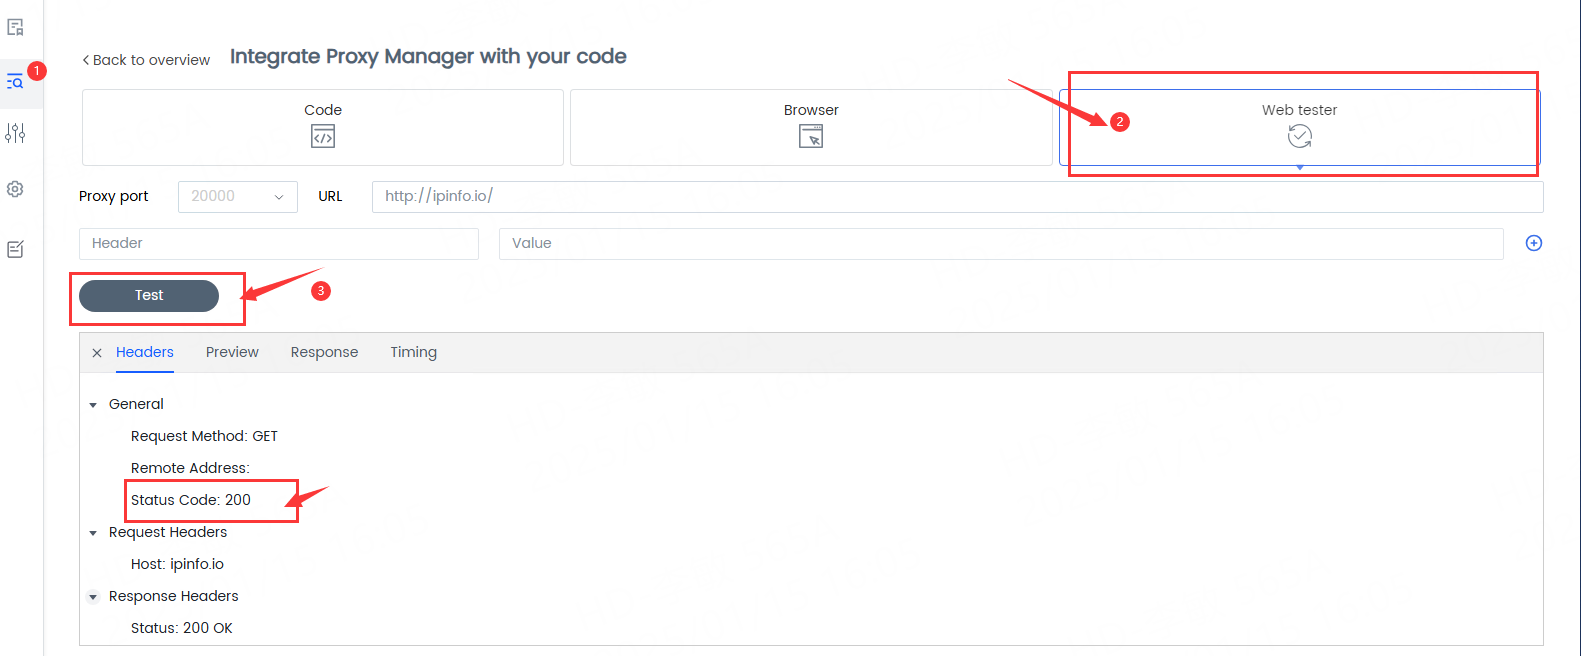
First, please click the second button on the left side of Luna Proxy Manager and click "Web Test". Check whether the status code is displayed as 200. If it is, it means it is running normally. If no information is displayed yet, click the "Test" button.
Second, open a browser with this port configuration for browsing.
1. Click the first icon on the left side of the proxy manager -> click the browser icon to open the browser

The pop-up browser will automatically display the IP address and country code corresponding to this port.
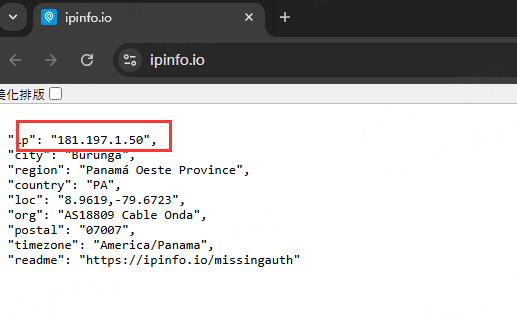
You have successfully set up Luna Proxy Manager and you can now use Luna's global IP proxies as you wish. I wish you a happy use!
4. How to use http mode
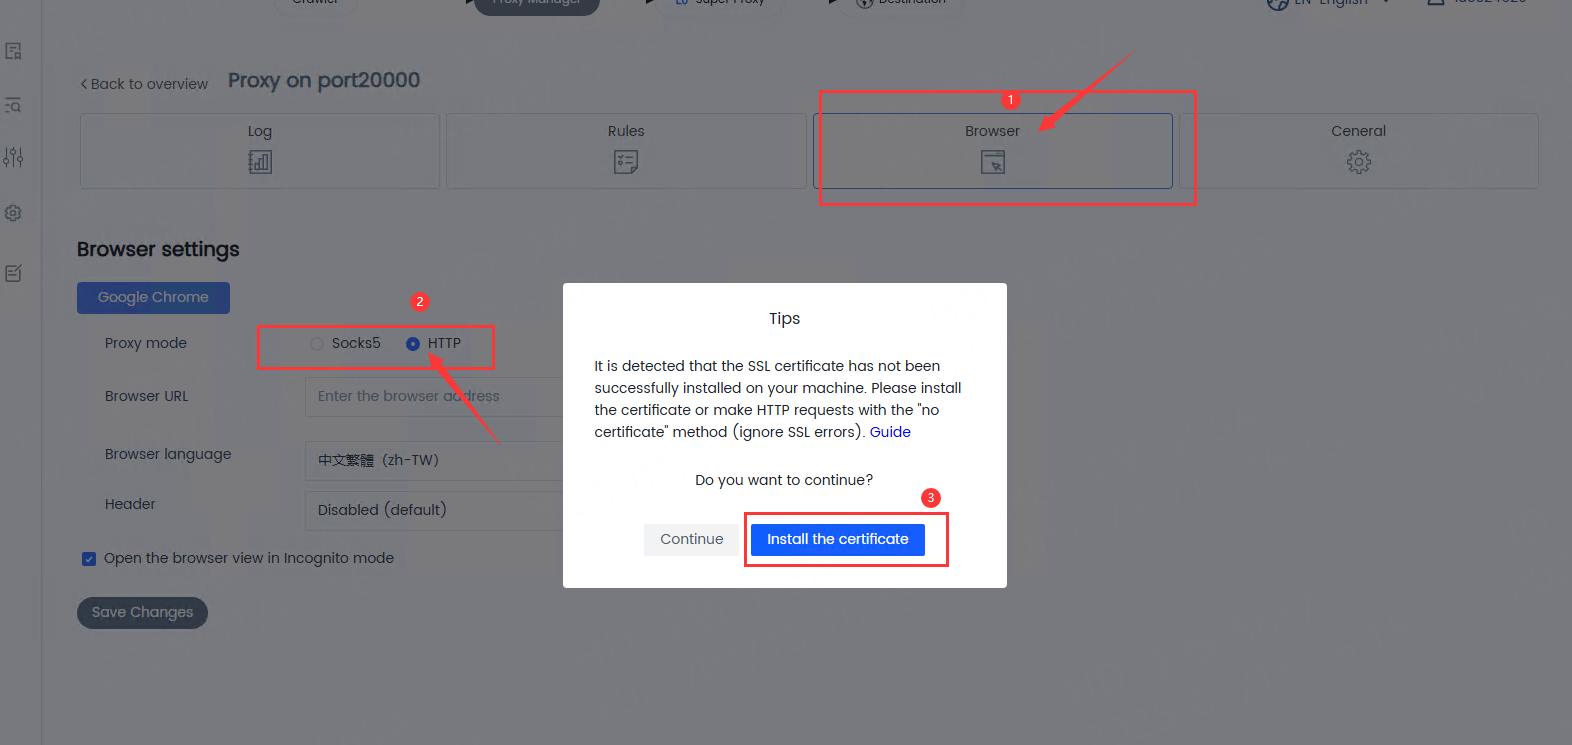
If you want to use an http proxy, you need to install an SSL certificate first.
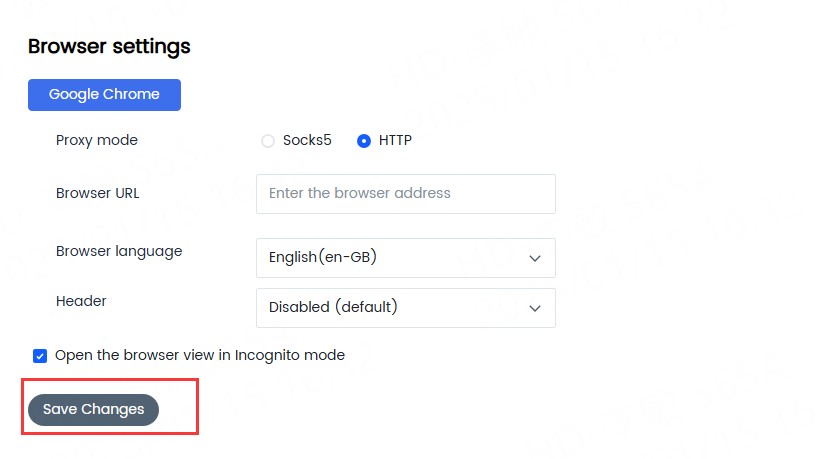
1. Click the settings icon-》Select browser options and switch to http

2.Follow the pop-up window prompts and click Install
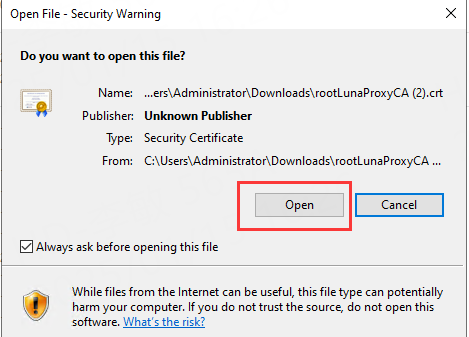
3.Click Install Certificate
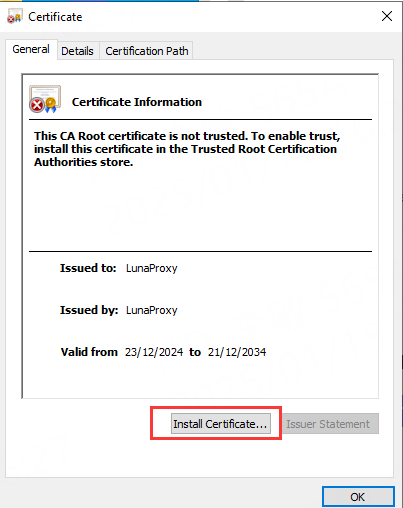
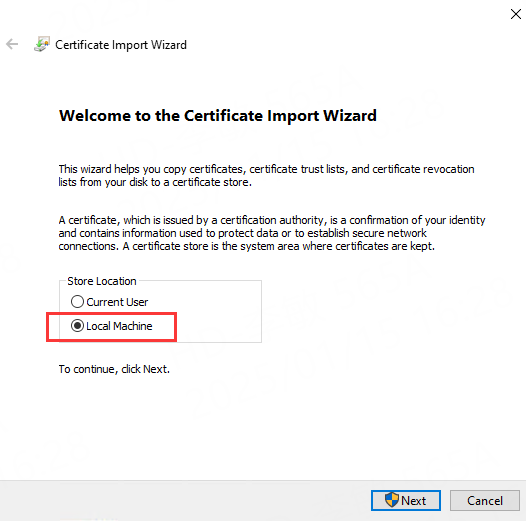
4.Select [Local Computer] to install
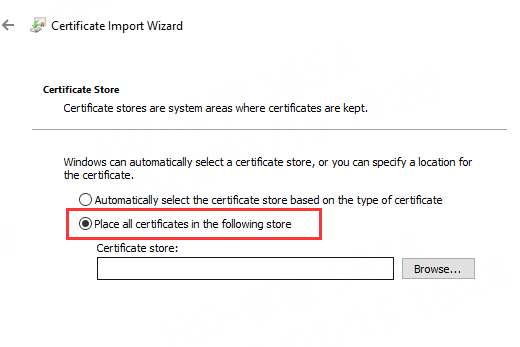
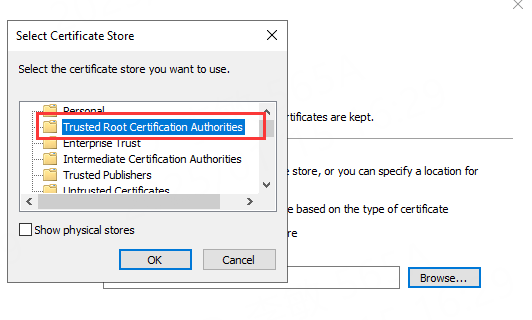
5.Select [Place all certificates in the following storage] and select the storage location; please install to a [Trusted] storage location
6.Click [Finish] and select the [Yes] option to complete the installation.

7.Click OK and save settings to start using the proxy

