Tip: If you need to use a sub-account, please refer to the sub-account adding tutorial: [Sub-account Adding Tutorial]
Account and Password Authentication
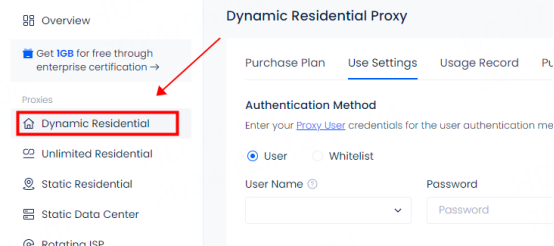
1. Enter the personal dashboard and click Dynamic Residential
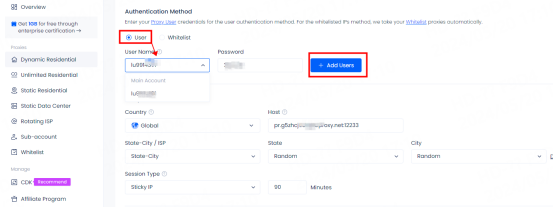
2. Click User and select the account you want to use. If you need to use a sub-account, click Add Account to enter the sub-account adding interface
3. Select the country you want to use. You can click Favorite for frequently used countries. You can view them in the Favorites folder after you have collected them
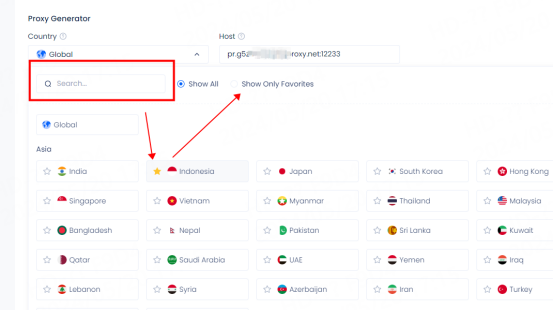
Tips: For more information about countries and states, click to download the country list

4. Select state-city/ISP
① After selecting state-city, you can select a specific area or random in the state and city list
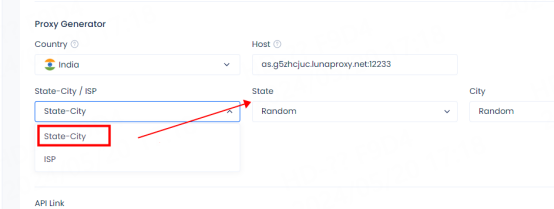
② Select ISP, you can select the supplier you need in the ISP list, and click to download the ISP list for detailed information
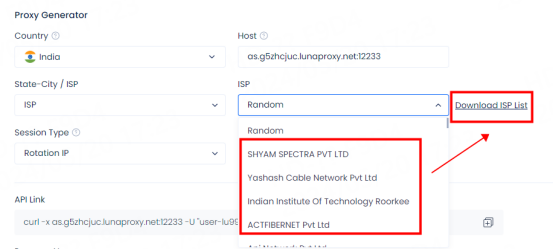
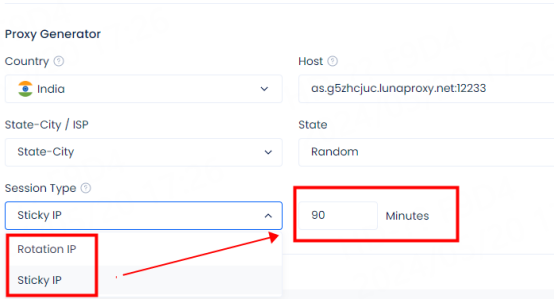
5. Select session type
Session type: ① Sticky IP can be stable for up to 90 minutes. After selecting sticky IP, you can manually modify the duration according to your needs
② Rotating IP will obtain a new IP for each request
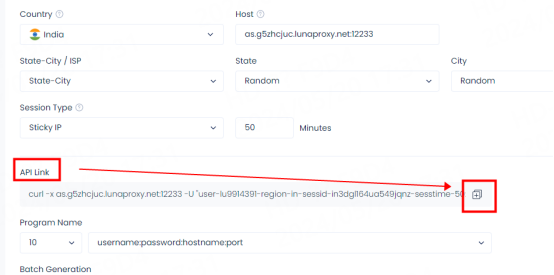
6. API link. After selecting, you can click to copy the API link to test whether the proxy is available in cmd
For the test tutorial, please refer to: [Proxy cannot connect]
7. Select the number of program names and usage format you need. The configuration information will be automatically updated below. If a new IP is required, you need to reselect the number of program names
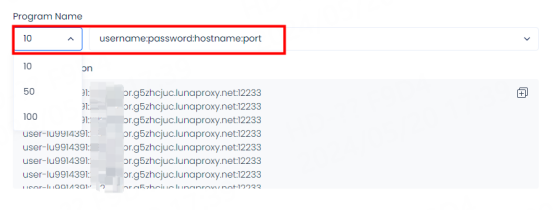
Tips: ① Select rotating IP. The configuration information is displayed the same, but different IPs are used in actual use
② Select sticky IP. The sessid in the configuration information is displayed differently. Different sessids represent different IP information. The sessid consists of English letters and numbers and can be changed manually
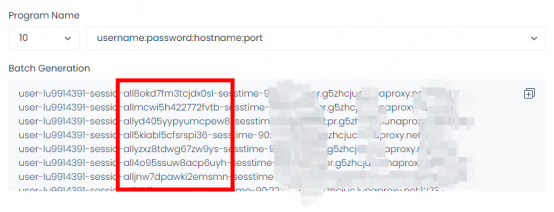
8. After the selection is completed, you can configure and use it. If you need to To use or manually set state, city and other information, please refer to API examples and usage examples
①API examples

②Usage examples
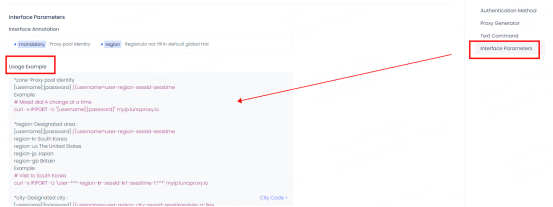
Username description:
Username = user-region-st-city-sessid-sesstime
For example: Select sub-account 516, United States, California, Adelanto
user-516-region-us-st-california-city-adelanto-sessid-y0xd3h4iy3pydiu9-sesstime-1
user-516: Set sub-user name
region-us: The country you selected. You can edit the country code to use IPs from different countries.
st-california: The state you selected. You can edit the state name to use IPs from a specific state.
city-adelanto: The city you selected. You can edit the city name to use IPs from a specific city.
sessid-y0xd3h4iy3pydiu9: The string used for fixed IP. You can edit this string to change the IP manually. The string must contain 12 characters, including letters and numbers.
sesstime-1: The duration of the IP you set. You can edit the number to change the duration. The shortest is 1 minute and the longest is 90 minutes.
After the extraction is successful, please refer to the tutorial for configuration. For more tutorials, please click: [User Guide]


