Step1: Preparation
Before integrating, you need to complete the following preparations
1. Download, install and log in to Dolphin{anty}
2. To obtain the proxy IP, please refer to the tutorial: [Dynamic Residential API Extraction] [Dynamic Residential Account Authentication]
Step2: Agent configuration
API configuration
API configuration is authenticated through IP whitelist. Please make sure you add the local IP to the whitelist before configuring.
Please refer to the tutorial to add a whitelist: [IP Whitelist Tutorial] https://www.lunaproxy.com/help/userguide/ip-WHITELISTING-TUTORIAL.html
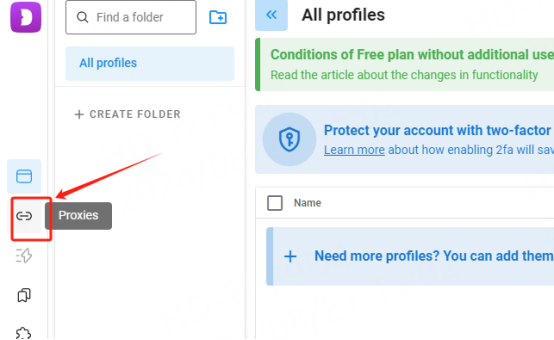
1. Click "Agent" on the left navigation bar to enter the agent configuration interface

2. Click "+" in the upper right corner to create an agent

3. Fill in the agent information
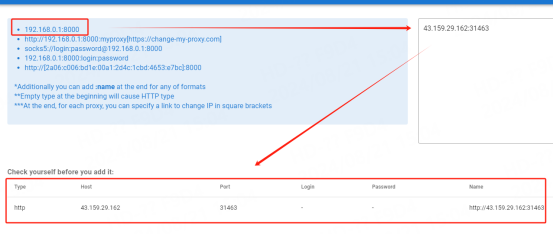
①IP, port
A. Refer to the proxy filling format on the left and fill in the proxy information on the right. Here you can fill in the IP and port according to the first example.

B. After filling in, click "Add" in the upper right corner

C. After adding, first check the added agent, and then click the detection button in the upper right corner. It can be used after the detection is successful.

Account and password configuration
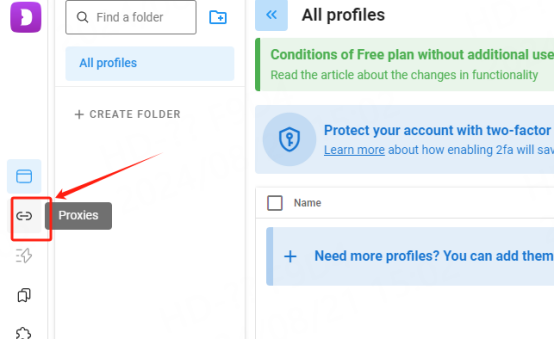
1. Click "Agent" on the left navigation bar to enter the agent configuration interface

2. Click "+" in the upper right corner to create an agent

3. Fill in the agent information
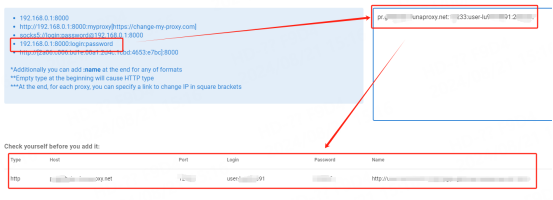
A. Refer to the proxy filling format on the left and fill in the proxy information on the right. Here you can fill in the host, port, account, and password according to the fourth example.

B. After filling in, click "Add" in the upper right corner

C. After adding, first check the added agent, and then click the detection button in the upper right corner. It can be used after the detection is successful.

You have successfully integrated LunaProxy with Dolphin{anty}!
Connection failed
If the detection fails, please refer to our testing tutorial: [Proxy cannot connect]


